Purpose
To move a joint for loading, bearing coverage, symmetry, etc. You can also move a joint relative to a user-defined joint or snap point.
Prerequisites
An existing truss
Steps
To move a joint on a truss:
- Open the truss and select the joint to edit.
The selected joint is highlighted.
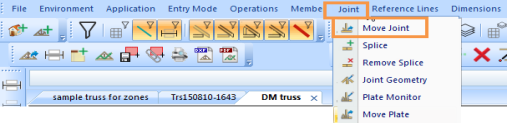
- From the Joint menu, select Move Joint, click
 , or right-click to select.
The Move Joint window displays:
You can do the following:
- Move the joint a specified distance and direction
- Move the joint from a specified point
To move the joint a specified distance/direction:
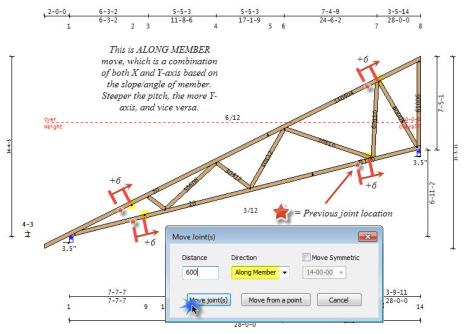
- Enter a distance and direction to move the joint and click OK.
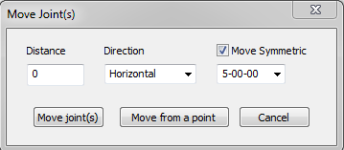
- For Horizontal the selected joints are moved from their current location by the horizontal offset distance (+ to the right, - to the left).
- For Vertical, the joints are moved along the member they are on; therefore, they are offset from their current Y location the specified offset distance (+ up, - down).
- For Along Member, the joints are moved along the member they are on the specified offset distance (+ right or Up if member is vertical, - left or Down if member is vertical).
The joint moves the distance and direction specified.
In all cases where there are multiple joints to move:
-
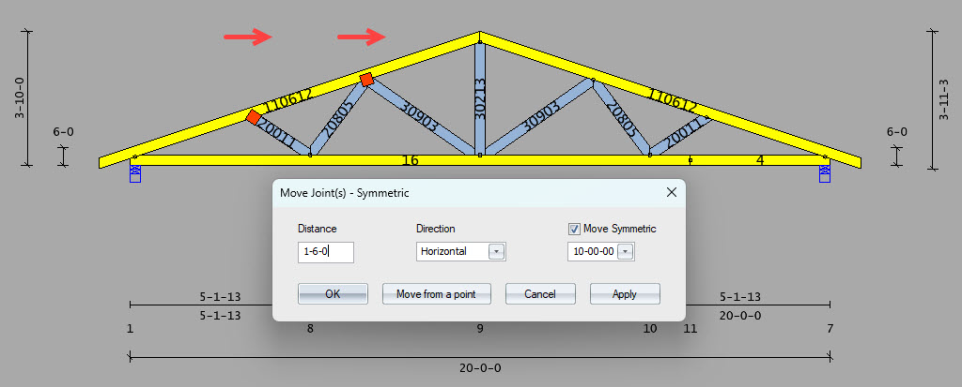
If the joints to be moved fall on the same side of the symmetric line location, the distance to move is the same sign (-/- or +/+).
-
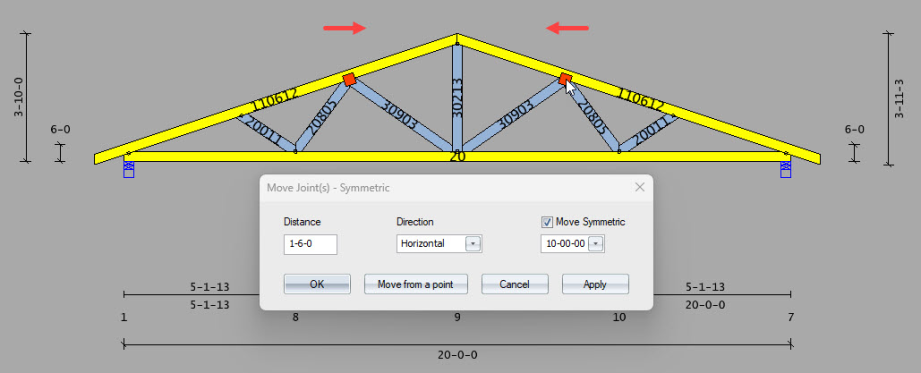
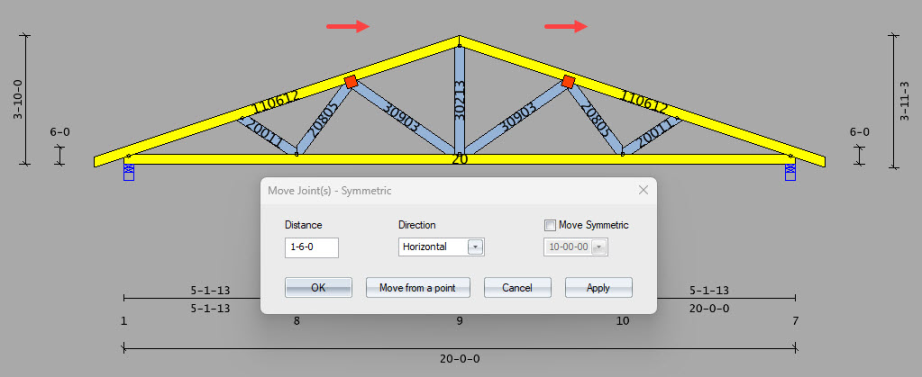
If the joints to be moved fall on opposite sides of the symmetric line, the distance to move are opposite signs (-/+ or +/-) when Move Symmetric is ON or the same signs (-/- or +/+) when Move Symmetric is OFF.
 Notes:
- Positive numbers move the joint to the right by the distance specified; negative numbers move it to the left.
- You can simultaneously move more than one joint.
-
You can also use this command to move a splice joint.
To move the joint from a specified point:
- Click Move from a Point.
The following prompt displays:

- Select a point. To offset the point, first click the space bar.
- The offset will be a positive number that represents the selected distance that the joint should be from the selected point. The direction the joint moves is based on which side the joint is from the selected point.
- For multiple joint moves, the first joint selected will move to be the offset distance from the selected point. Any additional joints that were selected would move relative from the selected point by the same amount as the first joint was moved.
- In all cases where there are multiple joints to move, if the joint to be moved falls on the same side of the symmetric line location then the distance to move would be the same direction as the first joint. If the Move Symmetric option is selected and the joint to move falls on the other side of the symmetric line, the direction of the distance to move would be the opposite.
If the selected point is not on the member and the Along Member option is selected, a line parallel to the member the joint is on is created and the joint point and the selected point are projected onto the line to give the Along member length to move the joint. If additional joints were selected to move, they may or may not be on the same member with the same slope, but use the same Along Member length determined for the first joint for these joints.